How to Activate Your eSIM After Installation
Installing vs. Activating: They're Different Steps
This is the most important thing to understand about using an eSIM for travel:
- Installing = downloading the eSIM profile onto your phone. Do this at home before your trip.
- Activating = turning on the eSIM line so it connects to a network. The best time to do this depends on your plan type (see below).
If you haven't installed your eSIM yet, start with our installation guides for iPhone or Android first, then come back here.
Why does the timing matter? Most travel eSIM plans have a validity window (e.g., 7 days, 14 days, 30 days). When that window starts counting depends on your plan:
- Instant activation plans: Validity starts when the eSIM profile is downloaded/installed. For these plans, it is especially important not to install too early before your trip, since the clock is already ticking.
- Activation upon arrival plans: Validity starts when the eSIM first connects to a cell tower in the destination country. For these plans, you can safely install at home — the clock won't start until you land.
Check your plan details on your order page to see which type you have. When in doubt, the safest approach is to install the eSIM at home but keep the line turned off until you arrive at your destination.
Activate on iPhone
- Open Settings
- Tap Cellular (or Mobile Data)
- You'll see a list of your cellular plans — tap the eSIM plan you installed (it should show the label you gave it, like "Japan Travel")
- Toggle Turn On This Line to enable it
- Go back to the Cellular settings screen
- Tap Cellular Data (at the top of the plan list)
- Select your eSIM plan as the line used for cellular data
- Go back, then tap your eSIM plan again
- Toggle Data Roaming to on
That last step is critical. Travel eSIMs work via roaming agreements with local carriers. If Data Roaming is off, you'll see the eSIM as active but you won't get any data connection.
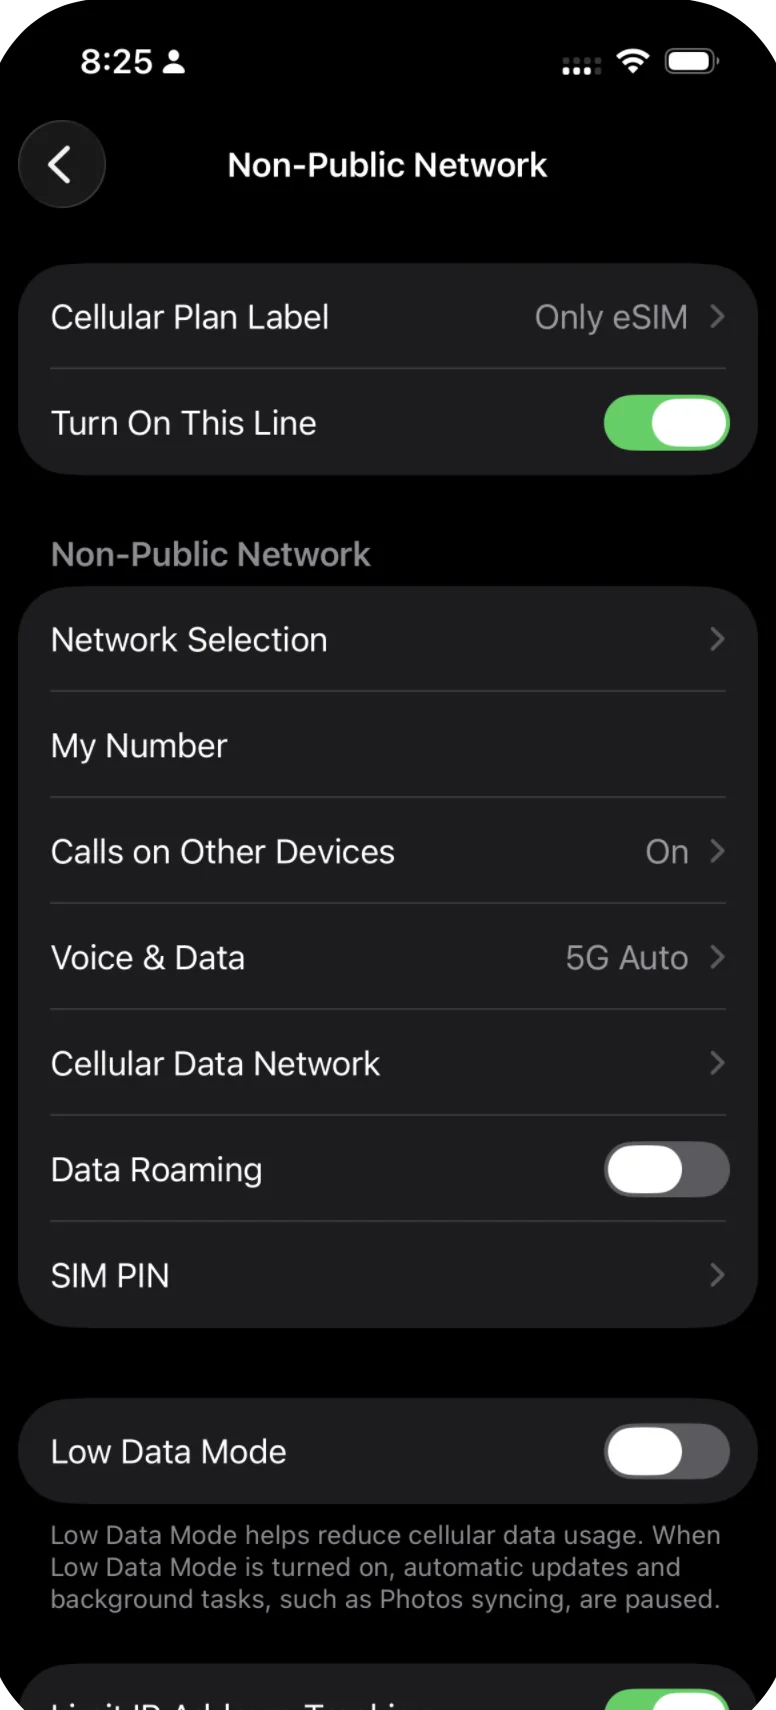
Here's what the eSIM detail page looks like. Make sure "Turn On This Line" is enabled.
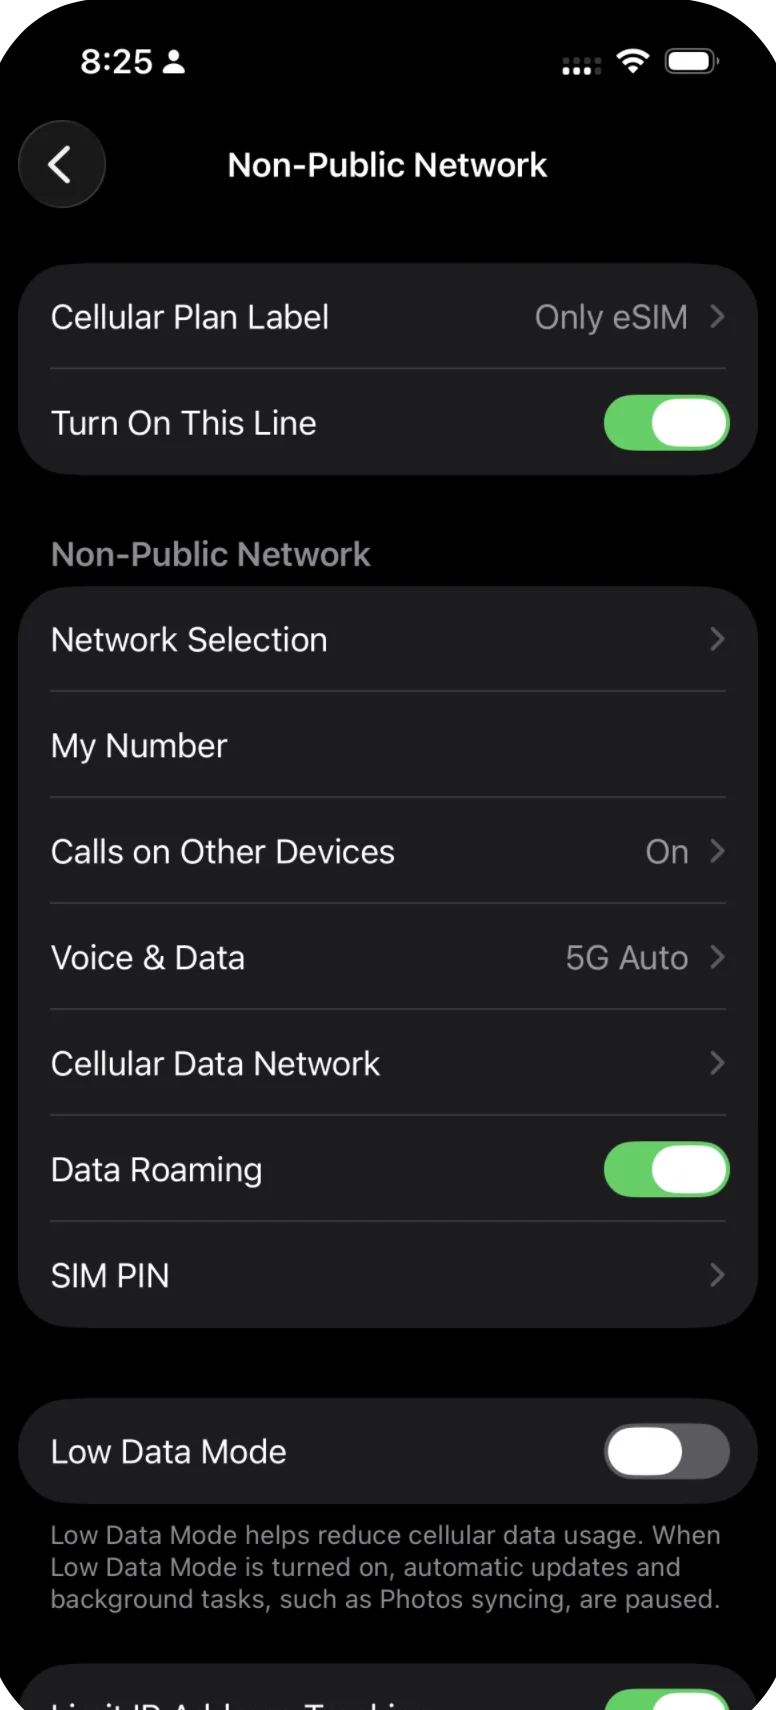
Toggle Data Roaming ON — this is required for travel eSIMs.
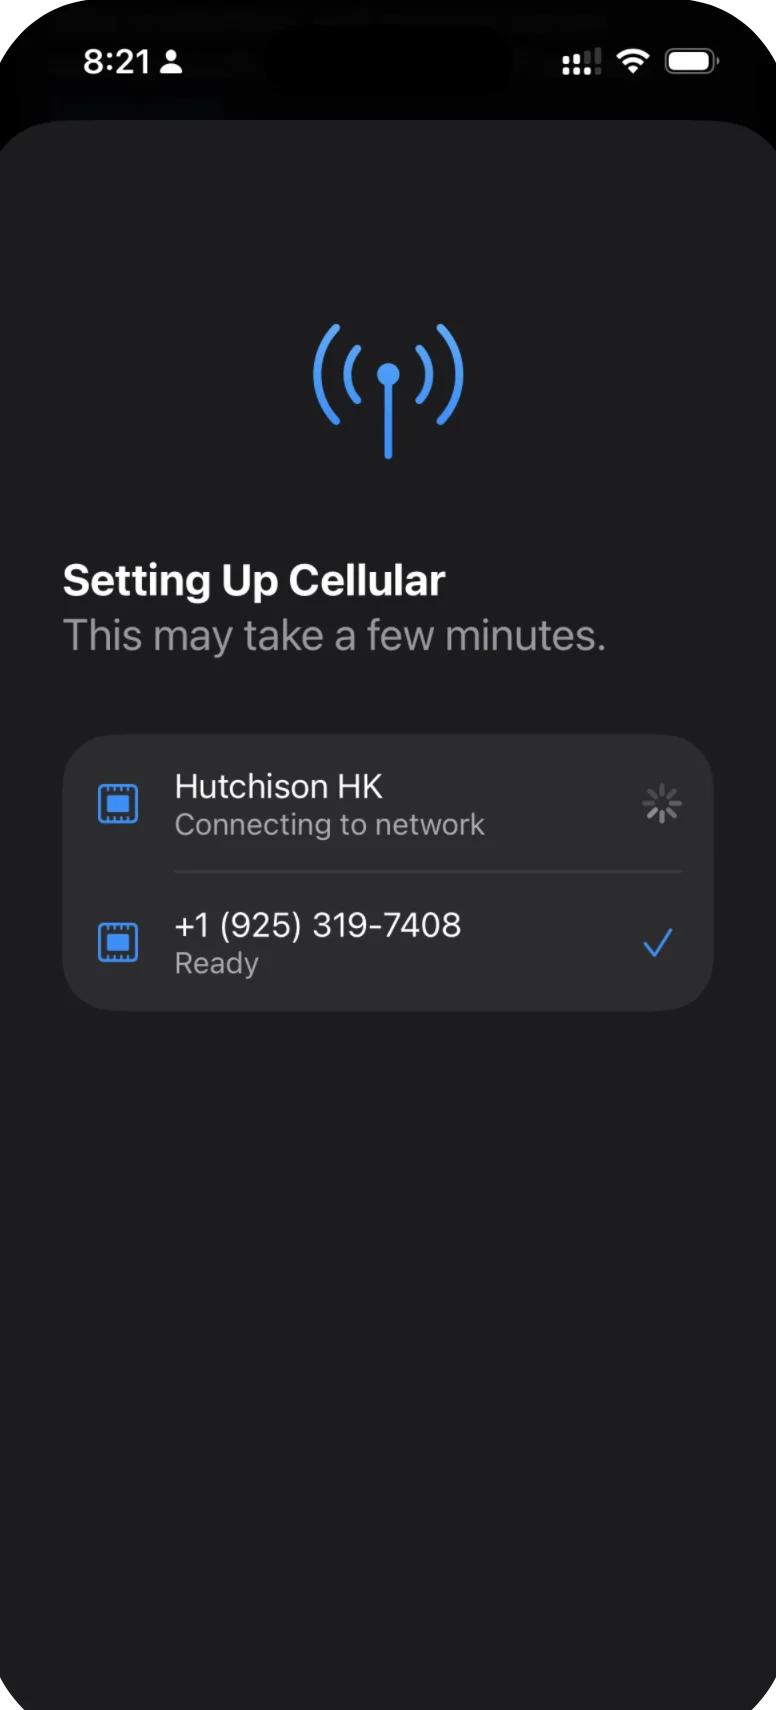
You'll see "Setting Up Cellular" while your eSIM connects to the network.
Activate on Google Pixel and Stock Android
- Open Settings
- Tap Network & Internet
- Tap SIMs
- Tap your eSIM plan
- Toggle the switch at the top to turn it on
- Tap Data Roaming and toggle it on
- Go back to the SIMs screen
- Tap Preferred SIM for data (or a similar option)
- Select your eSIM plan as the default data line
Activate on Samsung Galaxy
- Open Settings
- Tap Connections
- Tap SIM manager
- Under your list of SIMs, tap the eSIM you installed
- Toggle the switch to turn it on
- Back in SIM manager, tap Mobile data
- Select your eSIM as the line for mobile data
- Go to Settings > Connections > Mobile networks
- Toggle Data Roaming to on
Set Your eSIM as the Default Data Line
This step is easy to overlook but it's essential. Your phone needs to know which SIM card to use for internet data. If your primary SIM is still set as the default data line, your phone will try to use that instead of your travel eSIM — which means roaming charges on your home plan.
On iPhone: Settings > Cellular > Cellular Data > select your eSIM plan.
On Android: Settings > Network & Internet > SIMs > Preferred SIM for data > select your eSIM.
On Samsung: Settings > Connections > SIM manager > Mobile data > select your eSIM.
Troubleshooting: No Connection After Activation
If you've turned on your eSIM and enabled Data Roaming but still can't get online, try these steps in order:
-
Toggle Airplane Mode. Turn Airplane Mode on, wait 10 seconds, then turn it off. This forces your phone to re-scan for available networks.
-
Restart your phone. A full restart clears any temporary connection issues. Power off completely, wait a few seconds, and power back on.
-
Check network selection. Go to your phone's network settings and make sure it's set to Automatic network selection (not manually locked to a specific carrier).
-
Confirm you're in a covered area. Check your plan details to make sure the country or region you're in is covered. If you're inside an airport building or underground, try moving to an area with better signal.
-
Wait a few minutes. In some cases, the eSIM profile needs a brief moment to register with the local network after first activation. Give it 2-5 minutes.
If none of these steps work, reach out to our support team at onlyesim.com and we'll help you get connected.
Related Articles
How to Check if Your Device is eSIM Compatible
Learn how to check if your iPhone, Samsung, or Google Pixel supports eSIM before purchasing a travel data plan. Step-by-step instructions for all major devices.
How to Install Your eSIM on Android (QR Code & Manual)
Step-by-step guide to install your Only eSIM travel data plan on Android phones including Samsung Galaxy and Google Pixel using QR code or manual entry.
Is Your Phone Carrier-Locked? How to Check and What to Do
Carrier lock is the number one reason eSIM installation fails. Learn how to check if your iPhone or Android is unlocked, and how to request an unlock from your carrier.
Was this article helpful?